未来を変えるAI「Gemini」ChatGPTを超える…その可能性を徹底解説
- Googleの生成AI「Gemini」 は旧Bardを統合したChatGPT対抗のマルチモーダルモデル
- Gemini 3世代をベースに、高速モード・思考モード・Proモードを切り替えて利用できる
- Googleサービスとの連携が強力で、検索・Gmail・スプレッドシートなど業務効率化に直結
皆さんはGoogleの「Gemini(ジェミニ)」を使ったことがありますか?
Geminiはもともと「Bard」という名称のAIチャットサービスで、ChatGPTの対抗馬として開発されました。
2023年12月には搭載モデルが「Gemini Pro」へとアップデート。テキストでのやり取りやコード生成はもちろん、画像認識や拡張機能によるGoogleアプリとの連携までできるんです!しかも誰でも無料で使えます。
今回は、Geminiの概要や使い方、実際の活用事例、各モデルの違いなどを紹介します。最後までご覧いただき、ぜひお手元のデバイスでGeminiを使ってみてください!
\生成AIを活用して業務プロセスを自動化/
GoogleのAIモデルGeminiとは
2023年12月、GoogleはChatGPTと似た性能を持つ最新版マルチモーダル生成AI「Gemini」をリリースしました。日本語での読み方は「ジェミニ」です。
もともとGeminiは対話型の生成AIである「Bard」に搭載されていたAIでしたが、2024年2月にBardはGeminiとして統合されました。以前Bardを使っていた方も、同じアカウントでGeminiを利用できます。
ここでは、この新しくなったGeminiの基本を解説します。
Geminiの概要
Geminiとは、Googleが開発したAIモデルおよびAIチャットサービスの名称です。文章作成や要約、画像・動画生成、コード作成などを行えるマルチモーダル生成AIとして提供されています。
現在のGeminiはGemini 3シリーズをベースとしており、アプリでは高速モード・思考モード・Proモードを切り替えて利用できます。用途に応じて使い分けられるのが特徴です。
また、開発者向けのGemini APIでは、gemini-3-proやgemini-3-flashなどのモデル名で提供されています。
マルチモーダル生成AIとは?
マルチモーダル生成AIとは、異なるタイプのデータ(テキスト、画像、音声など)を理解し、それらを組み合わせて処理する能力を持つ生成AIのことです。
マルチモーダル大規模言語モデル(MLLM)とも呼ばれます。
マルチモーダル生成AIの登場によって、テキストだけでなく画像や音声も入力できるようになり、さらに生成AIの利便性が向上しました。
Geminiにも最新のマルチモーダル生成AIが搭載されており、テキスト・画像・動画・音声・PDFなど複数のデータを同時に処理することが可能です。
Geminiの安全性について
結論から言えば、GeminiはGoogleによって適切に管理されており、基本的には安全に使える生成AIツールです。ただし、利用時の情報の取り扱いには十分な注意が必要です。
Geminiは、ユーザーとの会話内容や関連サービスの利用情報をGoogleのプライバシーポリシーに基づいて収集し、サービスの改善や機械学習に活用しています。このプロセス自体は厳重に管理されていますが、AIの仕組み上、一度入力した情報が学習に使われる可能性があります。
そのため、個人情報や機密情報は入力すべきではありません。万が一こうした情報が学習に使われると、他ユーザーの出力結果に反映されるリスクや、サイバー攻撃による情報漏洩の可能性があります。
なお、Geminiで画像生成できるか気になる方は、以下の記事をご覧ください。

Geminiの仕組み
Geminiに搭載されているマルチモーダルモデルは、従来のマルチモーダルモデルとはトレーニング方法が異なります。
従来は、テキスト・画像・音声などのモダリティごとに別々のモデルを用意してトレーニングを行い、各モデルを繋ぎ合わせて1つのマルチモーダルモデルとするのが一般的です。
複数のモデルを組み合わせて作られているため、特定のタスクにおいて優れた結果を出す一方、曖昧で複雑な推論は苦手でした。
一方、Geminiのマルチモーダルモデルは正反対です。
テキスト・画像・音声など各モダリティのトレーニングを、一貫して1つのモデルがまとめてトレーニングを行います。さらに、トレーニングされたモデルにモダリティ別でファインチューニングを行います。
その結果、Geminiはどのような種類の入力においても、他のマルチモーダルモデルを上回る理解を示すことができるのです。

Geminiモデルの種類と違い
以前のGeminiは、「Gemini Ultra」「Pro」「Flash」「Nano」といった名前でモデルが分かれていました。現在は、Gemini 3シリーズをベースにしながら、用途に応じてモードを切り替える形が基本になっています。
- 高速モード
- 思考モード
- Proモード
それぞれの違いを詳しくご紹介します。
| モード | 活用シーン |
|---|---|
| 高速モード | ちょっとした質問や下書きをサッと作りたいとき |
| 思考モード | 比較や整理、アイデア出しなど、少し考えてほしいとき |
| Proモード | 数式やコード、専門的な分析など、精度を重視したいとき |
用途に合わせてモードを切り替えられるので、まずは高速モードから試してみるのがおすすめです。
また、現在のGeminiでは、用途に応じて次のようなモデルが使われています。
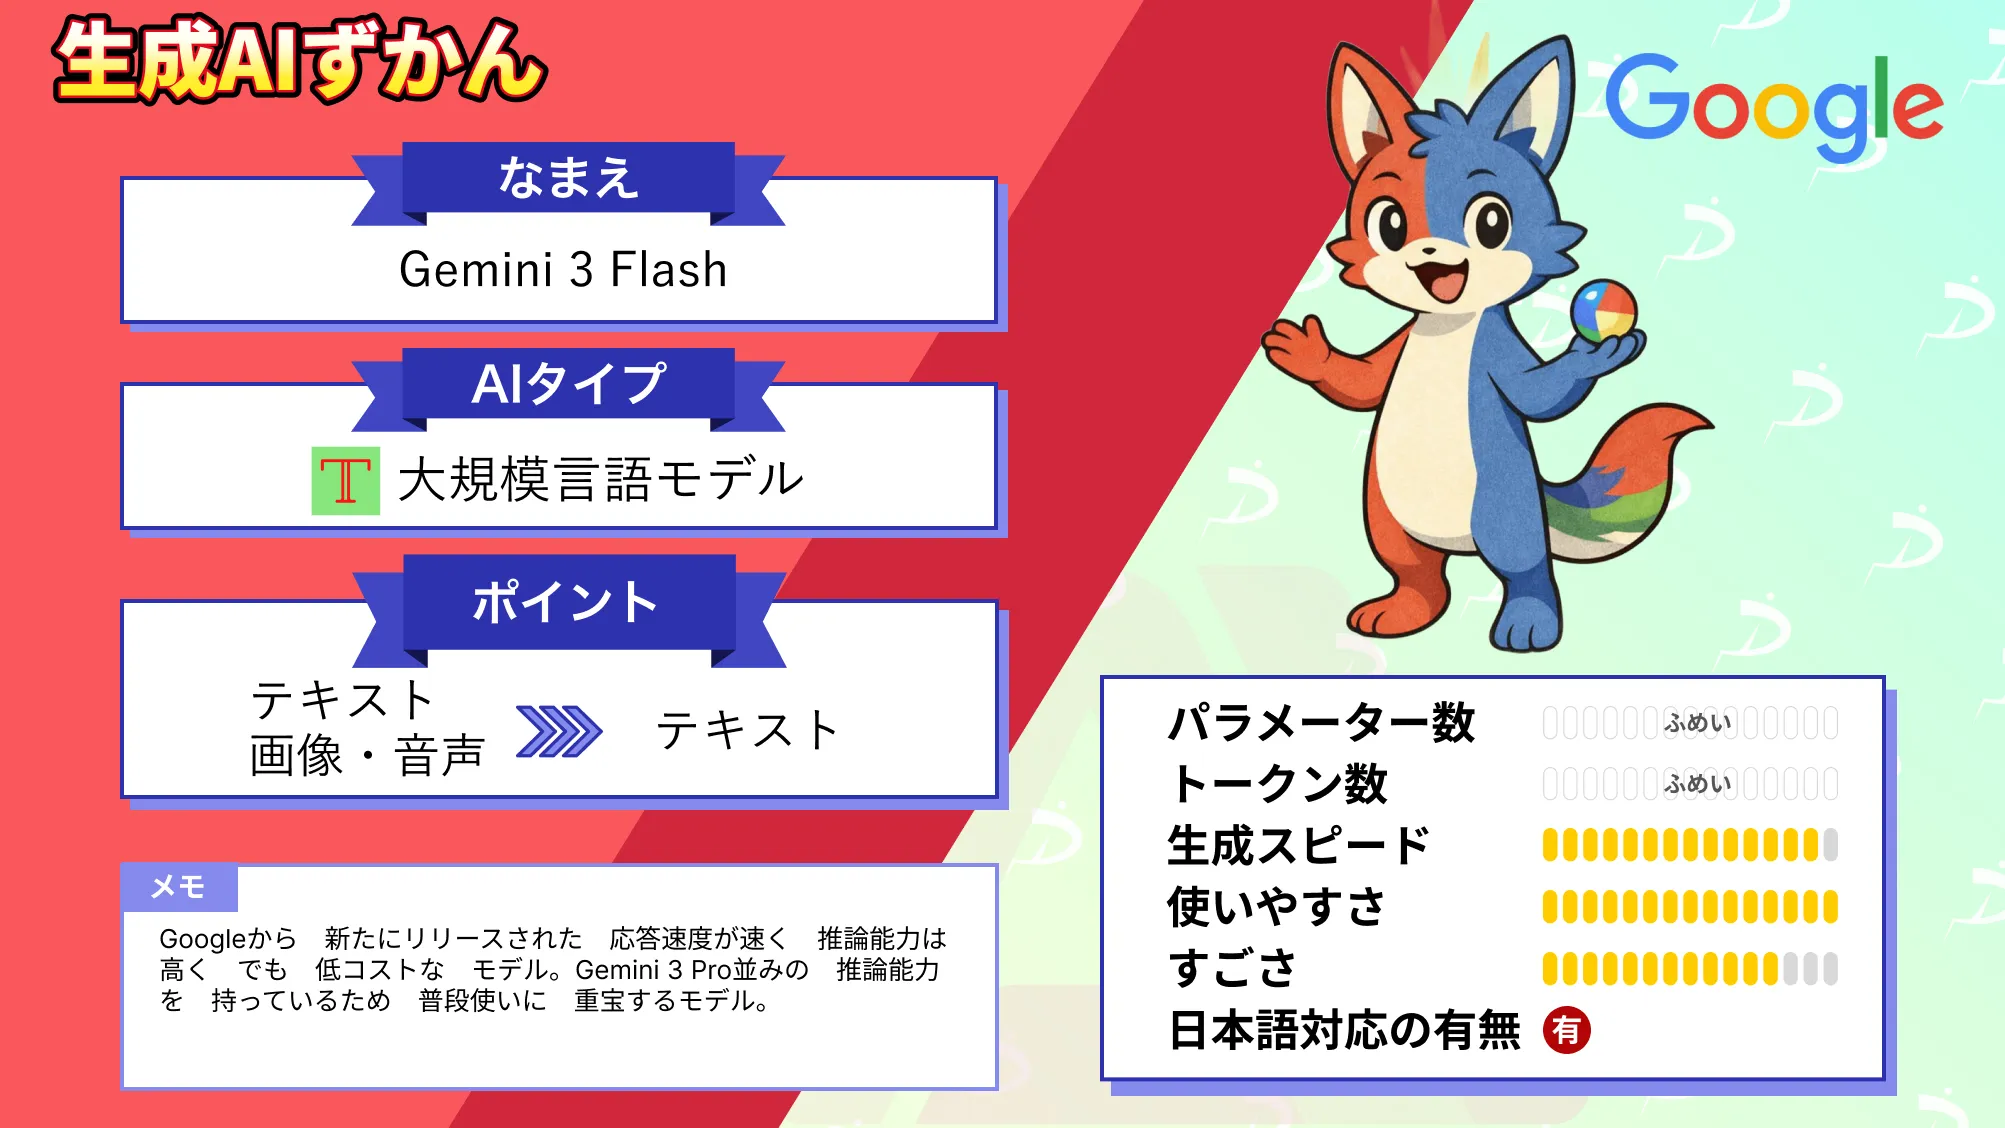
- Gemini 3 Flash
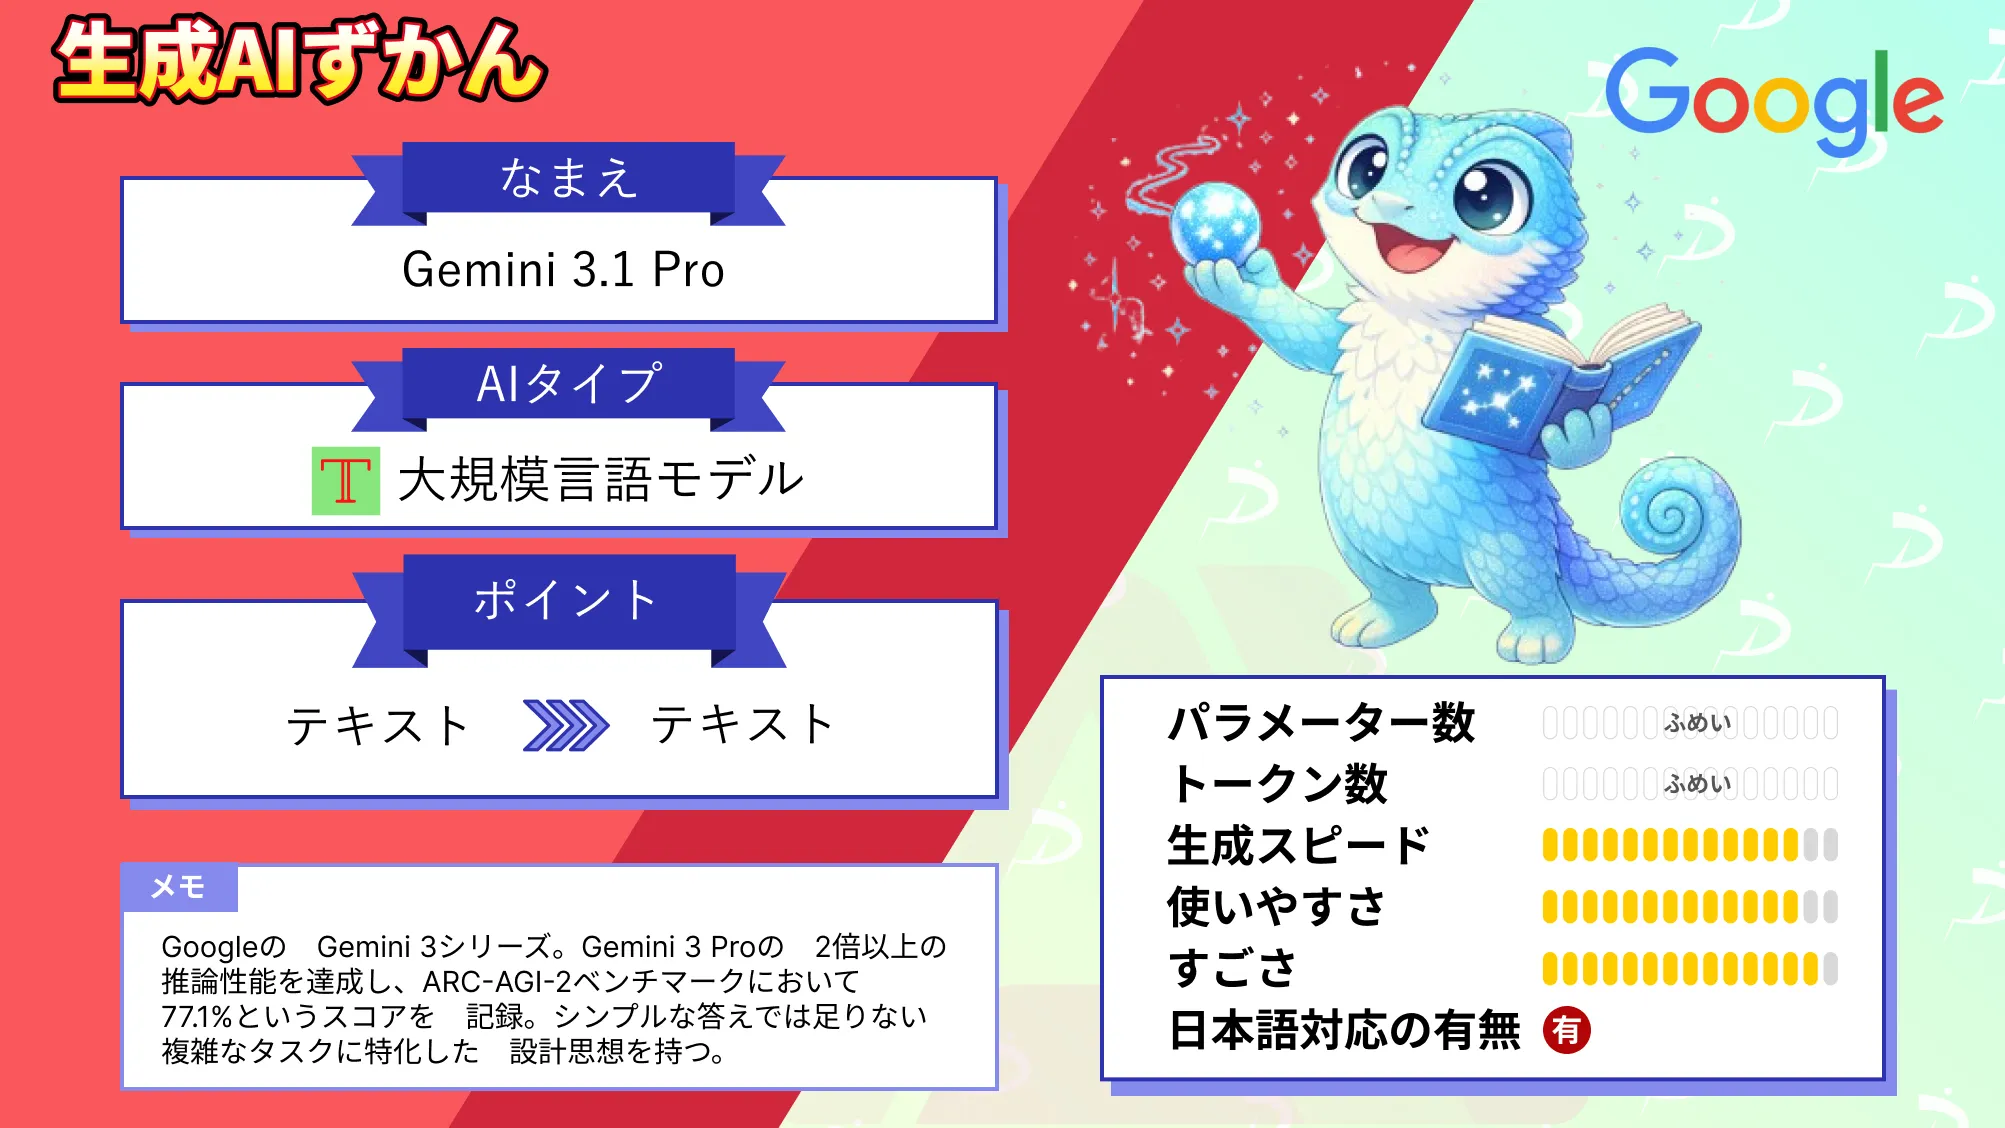
- Gemini 3.1 Pro
- Nano Banana Pro
- Veo 3.1 Fast
ここからは、それぞれのモデルについて解説します。
Gemini 3 Flash
Gemini 3 Flashは、応答速度を重視したAIモデルです。主に高速モードで使われることが多く、ちょっとした質問や文章の下書き作成など、テンポよくやり取りしたい場面に向いています。
処理が軽くスピードが速いのが特徴で、日常的な調べものやアイデア出し、簡単な文章作成などで活躍します。まずはこのモデルをベースに使う場面が多いでしょう。
なお、Gemini 3について詳しく知りたい方は、下記の記事を合わせてご確認ください。
Gemini 3.1 Pro
Gemini 3.1 Proは、推論や長文処理に強い高性能モデルです。複雑な質問への回答や、情報の整理と分析など、より精度が求められる場面で使われます。
文章の構成作成やコード生成、専門的な内容の解説などにも向いており、しっかり考えながら答えを出すタスクが得意です。思考モードやProモードで使われることが多いモデルです。
なお、Gemini 3.1 Pro〇〇について詳しく知りたい方は、下記の記事を合わせてご確認ください。
Nano Banana Pro
Nano Banana Proは、Geminiで画像を生成するときに使われるモデルです。テキストで指示を出すだけで、イラストや写真風の画像を作成できます。
画像の一部を修正したり、文字を入れた画像を生成したりといった編集にも対応しています。SNS用のビジュアルやブログのアイキャッチ作成など、画像コンテンツを作りたい場面で役立つモデルです。
なお、Nano Banana Proについて詳しく知りたい方は、下記の記事を合わせてご確認ください。

Veo 3.1 Fast
Veo 3.1 Fastは、テキストから動画を生成できるAIモデルです。短いシーン動画やSNS向けの映像素材などを作る用途に向いています。
スピード重視の動画生成モデルで、アイデアのたたき台を作りたいときや、映像のイメージを素早く形にしたい場面で役立ちます。Geminiの有料プランで利用できる機能です。
なお、Veo 3.1 Fastについて詳しく知りたい方は、下記の記事を合わせてご確認ください。
Geminiの特徴10選
Geminiの特徴についてご紹介します。
競合他社の生成AIと共通する部分も多いですが、Geminiにしかない特徴ももちろんあります。ぜひ生成AIサービスを選ぶ際の参考にしてください。
Geminiの主な特徴は以下の10個です。
- 日本語の精度が高い
- 最新の情報を元にした回答が可能
- 1度の質問で3つの回答を得られる
- 拡張機能で他アプリと連携可能
- 位置情報の反映ができる
- コード生成に強い
- Chromeアドレスバーからの直接アクセスが可能
- スプレッドシート上でAI機能を使える
- 絵本を作成できる
- 生成されたテキスト・コードの直接編集が可能(Gemini Canvas)
1つずつ解説していきますね。
日本語の精度が高い
Geminiは、Googleが開発した生成AIとして、多言語対応に力を入れており、その中でも日本語の精度は高いレベルにあります。
従来の英語特化型AIに比べて、文脈理解や自然な日本語表現において優れており、質問応答・要約・文章生成など、幅広い用途で違和感の少ない日本語出力が可能です。
なお、日本語での出力品質はアップデートによって継続的に改善されており、ビジネス文書の作成から日常会話まで、幅広い領域で実用的に使えるレベルに達しています。
日本語の独特なニュアンスを理解する能力が高いため、日本語話者としては頼もしい限りです!
最新の情報を元にした回答が可能
Geminiは、Google検索を通じてリアルタイムの情報にアクセスできるため、回答は常に最新の内容が反映されています。
今空いてるホテルを探す場合やリアルタイムのニュースを知りたい場合など、最新情報を求める場合にとても便利ですね。
さらに、Geminiは参考にしたWebページのURLを提示してくれるため、効率的にファクトチェックが行えます。
生成AIからハルシネーションを完全に無くすことは難しいとされていますが、Geminiであればハルシネーションは起こりにくいと言えるでしょう。Google検索内の膨大なデータを使えるGoogleが開発した生成AIならではの強みですね。
1度の質問で3つの回答を得られる
Geminiは、1度の質問に対して内容が異なる回答を3つ用意してくれます。
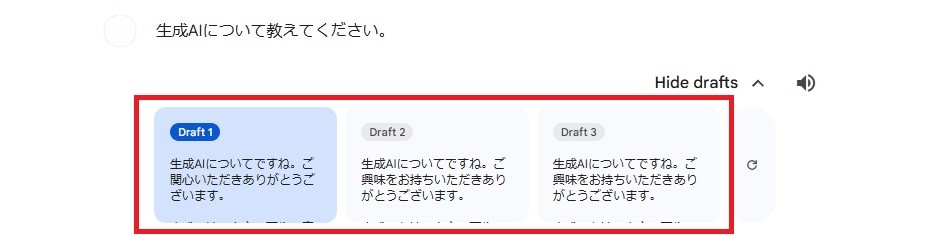
他の生成AIは1度の質問に対して1つの回答のみなので、Geminiの方がより最適な答えを見つけやすいように工夫されています。
他の生成AIを使うと、「もう少し違うニュアンスの回答がほしい」と思うこともありますよね。その点、初めから回答が3パターンあるGeminiなら、そのような煩わしさもありません。
拡張機能で他サービスと連携可能
Googleの拡張機能を使えば、GmailやYouTube、Google Map、Googleドライブなど、他のGoogleサービスとの連携が可能です。
入力ボックスに半角で「@」を入力すると、連携できるGoogleのサービスが表示されます。

たとえば、Gmailから特定のメールを検索してきて欲しい場合や、Googleドライブから特定のファイルを検索してきて欲しい場合など、他のアプリケーションを立ち上げなくてもGeminiだけで完結します。
普段からGoogleサービスを使っている方にとっては、それぞれのアプリケーションを立ち上げる手間を削減できる便利な機能ですね!
なお、GoogleスライドとGeminiの連携については下記の記事を参考にしてください。
回答結果をエクスポートできる
Geminiは、検索内容と回答結果をGoogleスプレッドシートやGmailにエクスポートできます。
普段からこれらを利用しているユーザーにとっては非常に便利な機能ではないでしょうか。Gmailの場合は、回答内容を下書き保存をしてくれます。
下の画像のように、回答結果の共有マークをクリックすると共有方法が選択できます。
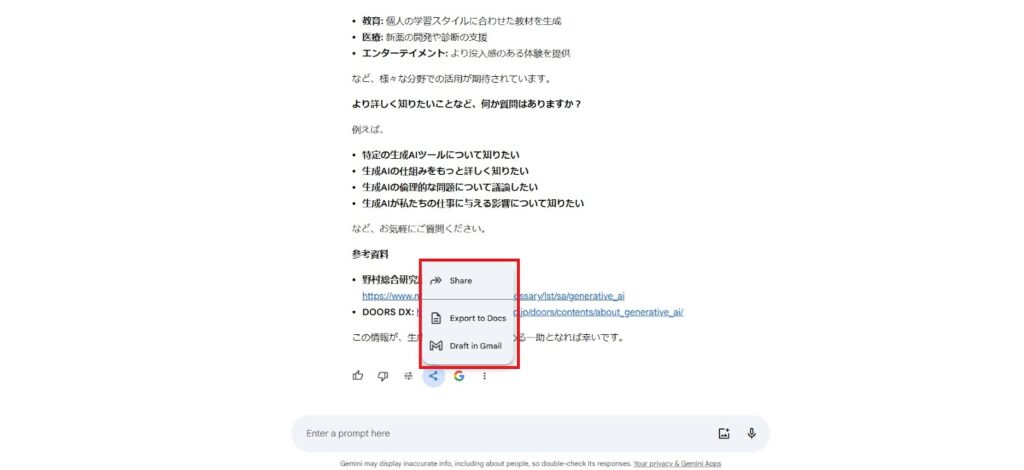
Googleを利用していない場合でも、1番上の「共有」を選択することで他者にも回答内容をリンクシェアできるので便利ですね。
位置情報の反映が可能
Geminiは位置情報を反映できるため、それを活用して色々と便利な使い方ができます。
たとえば、Geminiに行きたい場所を入力すると、位置情報を反映して目的地までの距離やルートを教えてくれて、回答から瞬時にGoogleマップで確認することもできます。
他にも、道に迷ったときにGeminiに「ここはどこ?」と尋ねると、すぐに今いる場所をマップ上で教えてくれます。そのままGoogleマップに移動して詳細を確認することもできますし、この状態から「家に帰りたい」と入力すると自宅までのルートを示してれるなど、様々な使い方ができます。
道に迷いやすい人はもちろんですが、災害時にも使える機能だと感じました。
なお、Geminiとグーグルマップの連携については下記の記事を参考にしてください。
コード生成に強い
Geminiは、コーディングやプログラミングに強く、PythonやJavaScript、Java、Goなど20以上のプログラミング言語に対応しています。
特にPythonについては、生成したコードをそのままGoogle Colabで実行・デバッグできるため、業務効率が大幅に向上します。
自然言語からコード生成もできるため、専門的な知識がなくてもウェブページやウェブサイトを作成することも可能です。
Webサイトの制作はもちろん、社内システムの構築やタスクの自動化など、ビジネスの様々なポイントで役に立つはずですよ。
なお、Geminiの活用方法について詳しく知りたい方は、下記の記事を合わせてご確認ください。
Chromeアドレスバーからの直接アクセスが可能
Googleが新たに打ち出した施策が話題を呼んでいます。2024年4月30日から、ChromeブラウザでGeminiを手軽に使えるようになったのです。世界100カ国以上で展開されたこの機能は、4月中旬にChrome Canaryでのテストを経て、満を持しての正式リリースとなりました。

使い方は驚くほど簡単。ブラウザのアドレスバーに「@gemini」と打ち込むだけで、すぐにGeminiとやり取りができるんです。この画期的な機能によって、情報検索はもちろん、翻訳や計算まで、わざわざ別のアプリを立ち上げる手間が省けるようになりました。
特に注目したいのは、Google Workspaceとの相性の良さ。Gmailの未読メールをサクッと確認したり、Google Drive内のファイルを探したり…。こうした日常的な作業が、驚くほどスムーズになるはずです。まさに、普段のオフィスワークが一変する可能性を秘めた機能と言えそうですね。
スプレッドシート上でAI機能を使える
Geminiは、Google Workspaceと統合されているため、Googleスプレッドシート上でもAI機能を利用できます。
Gemini for Google Workspaceを使えば、スプレッドシートのサイドパネルにGeminiが表示されるようになり、自然言語で以下のようなタスクを指示できます。
- 表の作成
- 数式の作成
- データの整理・分析
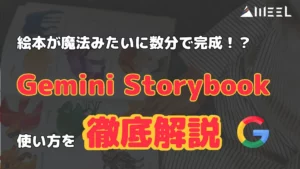
絵本を作成できる
2025年8月5日より、GeminiにStorybook機能が追加されました。Storybook機能は、画像やファイルをアップロードすることで、ナレーション付きで10ページの絵本を作れる機能です。
テキストでストーリーの概要を指定することで、誰でもオリジナルの絵本を作れるようになります。日本語に対応しているのはもちろん、45ヶ国語に及ぶ豊富な言語に対応しているのも魅力です。
なお、Gemini Storybookに関しては下記の記事を参考にしてください。
生成されたテキスト・コードの直接編集が可能(Gemini Canvas)
Geminiに新しく搭載されたGemini Canvasの機能を使えば、生成されたテキストやコードの直接編集が可能になります。従来であれば、出力された情報を一度別のプラットフォームに貼り付けてから編集する必要がありましたが、Gemini Canvasならこの手間が発生しません。
また、Gemini Canvasで生成したテキストをそのままレポートにすることも可能。Webページやアプリにもそのまま変換できるので、ぜひ試してみてください。
なお、Gemini Canvasについて詳しく知りたい方は、以下の記事もご確認ください。

Geminiと他のGoogle AIサービスとの違い
GoogleはGeminiの他にも様々なAIサービスを提供しています。それぞれ何が違うのか詳しく解説します。
GeminiとBardの違い
「Bard」はChatGPTの対抗馬として登場し、2023年5月から日本でも使えるようになりました。
2024年2月のGemini Ultra 1.0の登場と共に、BardそのものがGeminiへと変更されたと発表されています。改名しただけで、サービス内容は同じであり、「Google Bard」と検索するとGeminiが表示されます。
Geminiとなってからの大きな変化は以下の2つです。
- 有料版が登場
- モバイルアプリのリリース
Google AI Gemmaとの違い
「Gemma」とは、2024年2月にリリースされた、GoogleのオープンソースAIモデルです。比較的小型の言語モデルで、Geminiのようなマルチモーダルモデル生成AIではありません。
Geminiとの最も大きな違いは、Gemmaが「オープンソースAIモデル」で誰でも無料で利用できる点です。
Geminiは「クローズドAIモデル」と呼ばれ、AIモデルが一般公開されていないため個人の開発者や企業がGeminiのAIモデルを使うことはできません。
Gemmaは英語以外の言語はあまり精度が高くないと言われていましたが、2024年10月3日に「日本語版 Gemma 2 2B」が公開されたことで、日本語でも安心して使うことが可能です。
Google AI Plusの料金・活用シーンを詳しく知りたい方は、以下の記事もご覧ください。
Google Geminiの料金【無料版あり】
2026年3月現在、GeminiはGoogleアカウントさえあれば無料で利用できます。
無料プランでも、Gemini 3シリーズを使った基本的なチャットや画像生成は利用できます。ただし、思考モードやProモードには利用回数や処理量の上限があるので注意が必要です。
より多く使いたい場合や、動画生成やDeep Researchなどの機能も使いたい場合は、Google AI PlusやGoogle AI Proといった有料プランを選びましょう。用途に合わせて、段階的にアップグレードできます。
以下、Geminiの無料版と有料版の料金や特徴をまとめてみました。
| 項目 | 無料 | Google AI Plus | Google AI Pro | Google AI Ultra |
|---|---|---|---|---|
| 利用できるモード | 高速モード/思考モード(上限あり) | 無料より上限が拡大 | 高速/思考/Proモード | すべてのモードをより高い上限で利用可能 |
| 入力できるデータ | テキスト・画像・音声 | テキスト・画像・音声 | テキスト・画像・音声 | テキスト・画像・音声 |
| 生成できるデータ | テキスト・コード・画像 | テキスト・コード・画像 | テキスト・コード・画像・動画・音声 | テキスト・コード・画像・動画・音声 |
| 画像生成 | 〇(上限あり) | 〇(上限拡大) | 〇(高解像度対応) | 〇(より高い上限) |
| 動画生成 | × | △(一部対応の場合あり) | 〇 | 〇(より高い上限) |
| Deep Research | × | × | 〇 | 〇 |
| Gems作成 | × | 〇 | 〇 | 〇 |
| Webブラウジング | 〇 | 〇 | 〇 | 〇 |
| 外部サービス連携 | 〇 | 〇 | 〇(Workspace連携強化) | 〇(Workspace連携強化) |
| 料金 | 無料 | 1,200円/月(最初の2ヶ月間600円) | 2,900円/月(最初の1ヶ月間0円) | 36,400円/月(最初の3ヶ月間18,000円) |
無料版と有料版の違いは、思考モードやProモードの利用量、動画生成やDeep Researchなどの高度な機能が使えるかどうかといった点です。
テキスト生成などの基本的な使い方なら無料版で十分ですが、レポート作成や広告作成などのビジネス利用を想定している場合は有料版を検討する必要があります。
なお、Geminiの有料版について詳しく知りたい方は、下記の記事を合わせてご確認ください。
のできることまとめ!GPT-4ではできない最強活用事例10選.jpg)
Google Geminiの商用利用について
Geminiは商用利用も可能なサービスで、日々の仕事やお店の運営にも活用できます。「Google AI Pro」や「Google AI Ultra」といった有料プランを利用すれば、毎月の料金はかかりますが、レポート作成や広告づくりといった手間のかかる作業を効率よく進められます。
会社やお店でビジネス契約を結ぶと、社員同士がAIの答えを共有できるようになり、同じ情報をもとに仕事を進められるのも便利なポイントです。さらにセキュリティやサポートも手厚いため、安心して業務に組み込むことができます。
一方で、個人向けの無料版でも商用利用は可能です。ただし機能には限りがあるので、本格的に仕事に活かしたい場合は物足りなさを感じるかもしれません。趣味や小さな活動なら十分ですが、ビジネスでしっかり使いたいと考えるなら、有料プランを選んだ方が安心です。
どのくらいの規模でどう活用したいかによって、自分に合ったプランを選ぶと良いでしょう。
Google Geminiの利用上限について
Geminiには、プランごとに利用できる回数や処理量の目安があります。ただし、上限は固定ではありません。
利用できる量は、選んでいるモードや入力する文章の長さ、添付ファイルの容量、やり取りのボリュームによって変わります。使い方によっては、思ったより早く制限に達してしまうことも。
無料プランでは、高速モードは比較的使いやすい一方で、思考モードやProモードは利用できる回数や処理量に制限があります。より多く使いたい場合は、Google AI PlusやGoogle AI Pro、Google AI Ultraへの切り替えも検討しましょう。
画像生成や動画生成、Deep Researchといった機能も、プランごとに利用できる範囲が違います。長い資料をまとめて扱う場面や、本格的な制作を行う場合は、上位プランのほうが安心です。
Google Geminiの始め方・使い方
Google Geminiの始め方をステップバイステップで説明します。
PC・スマホ・iPadにおけるGeminiの使い方をそれぞれ紹介するので、ぜひ参考にしてみてください。
Geminiの使い方(PC版)
まだGoogleアカウントをお持ちでない場合は、新しくアカウントを作成します。
PCやスマホのブラウザで、Googleの検索ページにアクセスします。
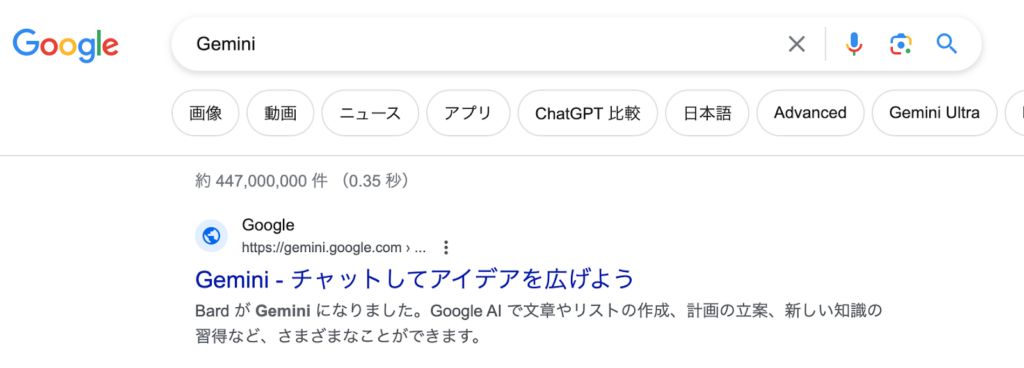
検索ページで「Gemini」と検索し、Geminiのサイトにアクセスします。
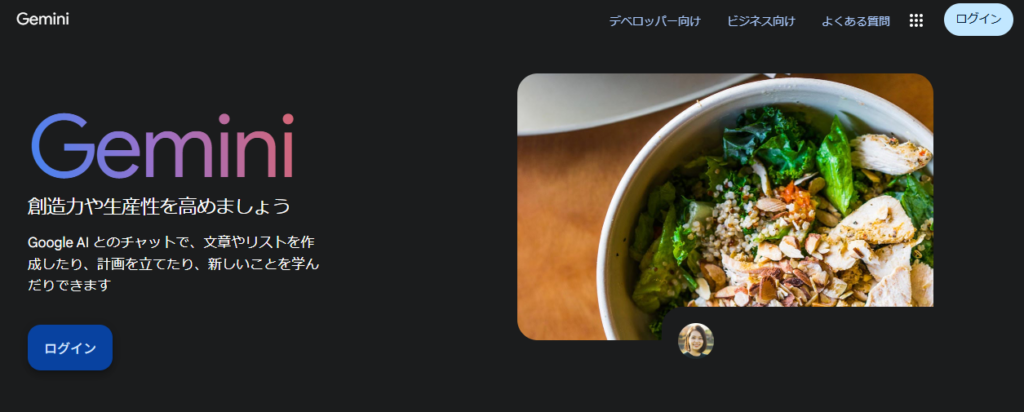
Geminiのトップ画面に移ると、青いボタンで「ログイン」と表示されます。これをクリックするとログイン画面に移り、利用規約が表示されるので同意して次に進みましょう。
たったこれだけで、Geminiが使えるようになります。Googleアカウントを作成済みであれば、トータル1分もかかりません。
Geminiの使い方はシンプルで、検索バーにプロンプト(指示)を入力するだけです。これだけで、以下のようにAIが自動で回答を生成してくれます。
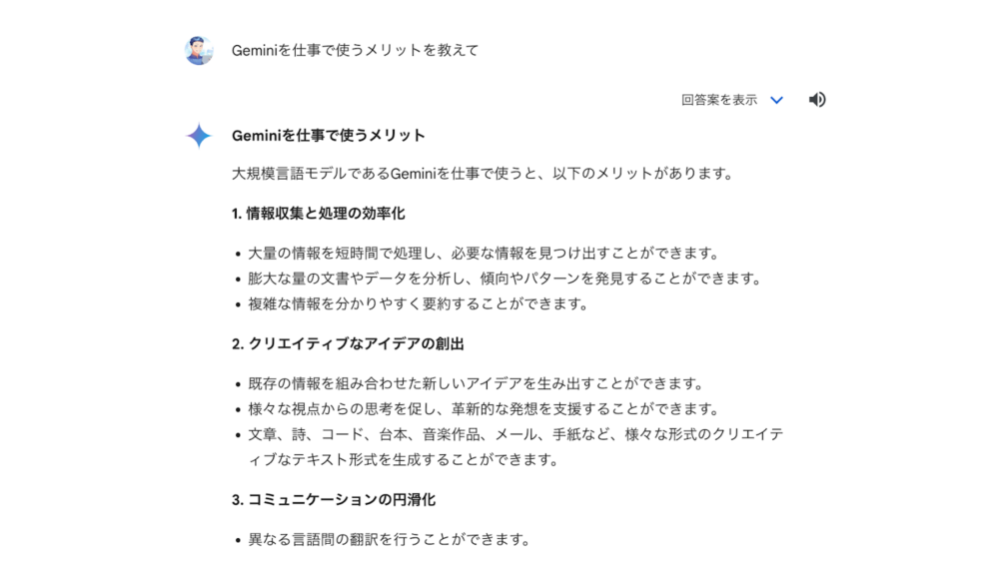
例えば「今日の東京の天気は?」「Pythonで機械学習のtutorialは?」などの質問に対して、Geminiが簡潔な回答をしてくれます。複数の質問を続けて入力することもでき、会話の流れで深い議論が可能です。
回答が不十分だと感じた場合は、「もっと詳しく教えて」「他にどのような方法があるのか」などとフォローアップの質問を投げかけることが重要です。Geminiは会話の文脈を理解し、回答をブラッシュアップしてくれます。
外出先からスマホで気軽に質問できるので、生活のあらゆる場面でGeminiの回答を活用できます。Googleアカウントさえあれば、手軽に便利なAIアシスタントを利用できるのが魅力ですね。
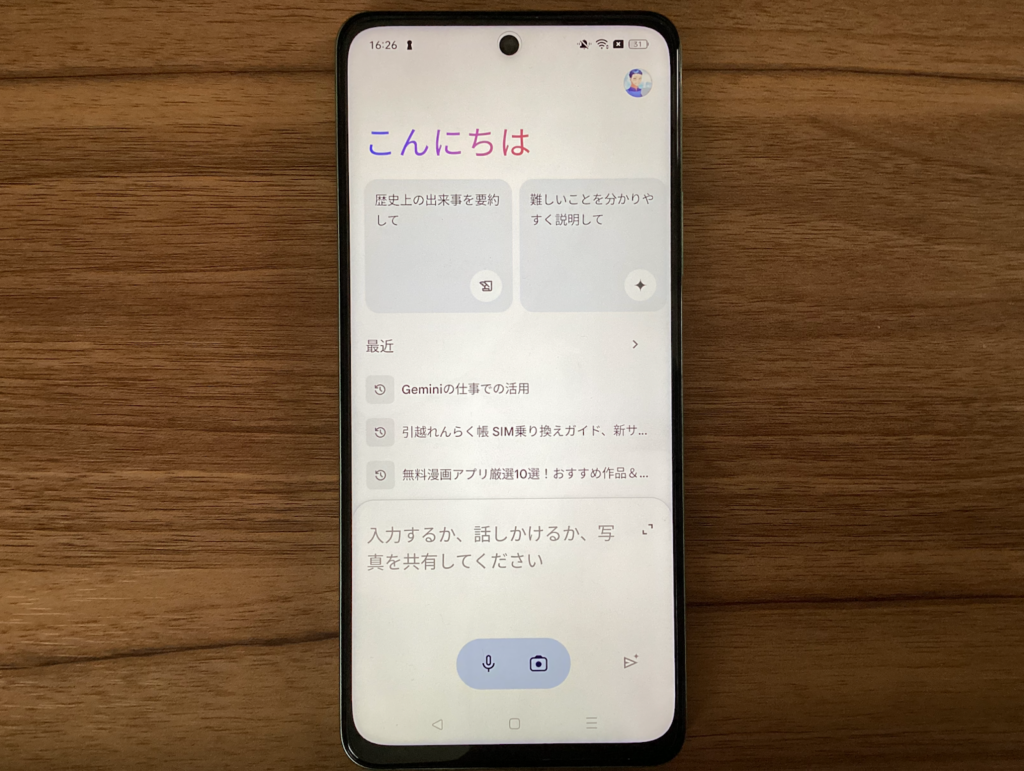
Geminiの使い方(スマホ版)
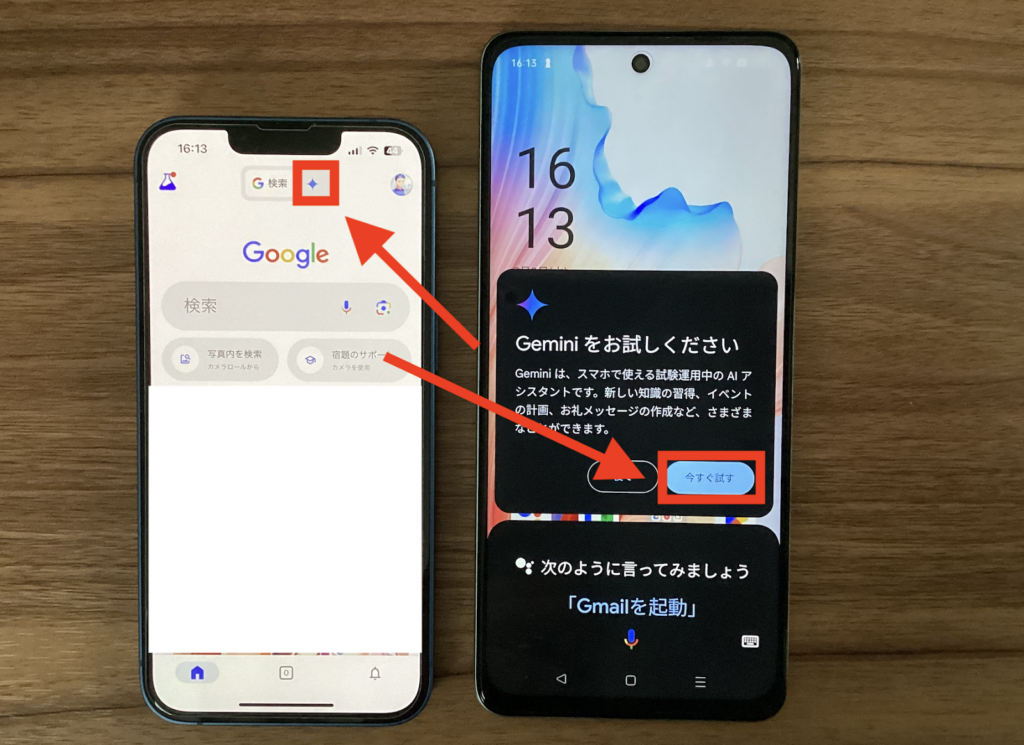
スマホでGeminiを使う場合は、基本的にGeminiアプリからの利用が可能です。実際に立ち上げるときは、以下画像の赤枠部分をタップします。
以下では、iPhoneとAndroidに分けて、それぞれの使い方を解説していきます。
iPhoneでGeminiを使う方法
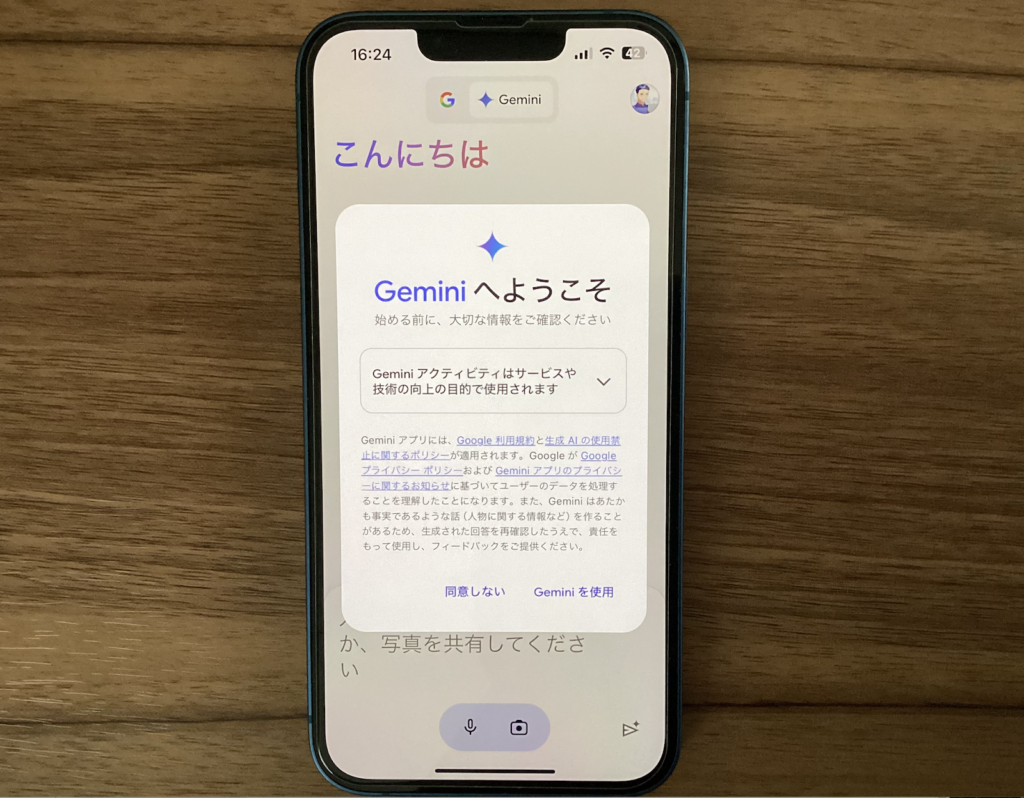
iPhoneでGeminiを使う場合は、まずGeminiアプリを開き、利用規約に同意します。
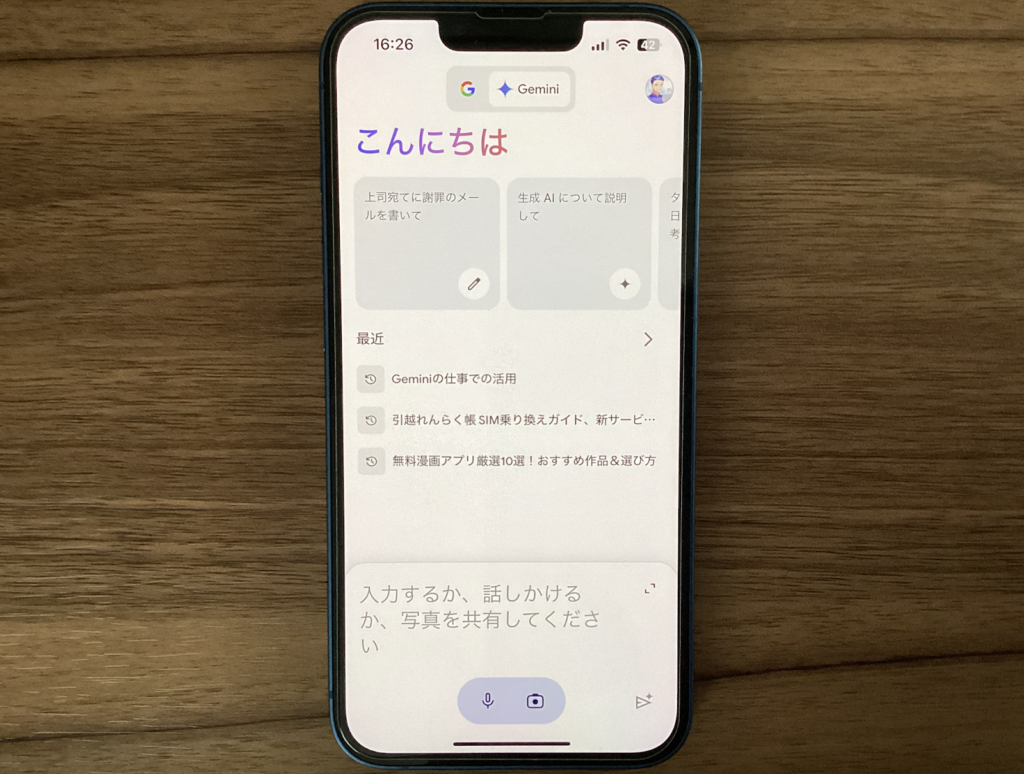
利用規約に同意するとすぐに使えるようになるので、あとは実際にプロンプトを入力してGeminiを使ってみましょう。
AndroidでGeminiを使う方法
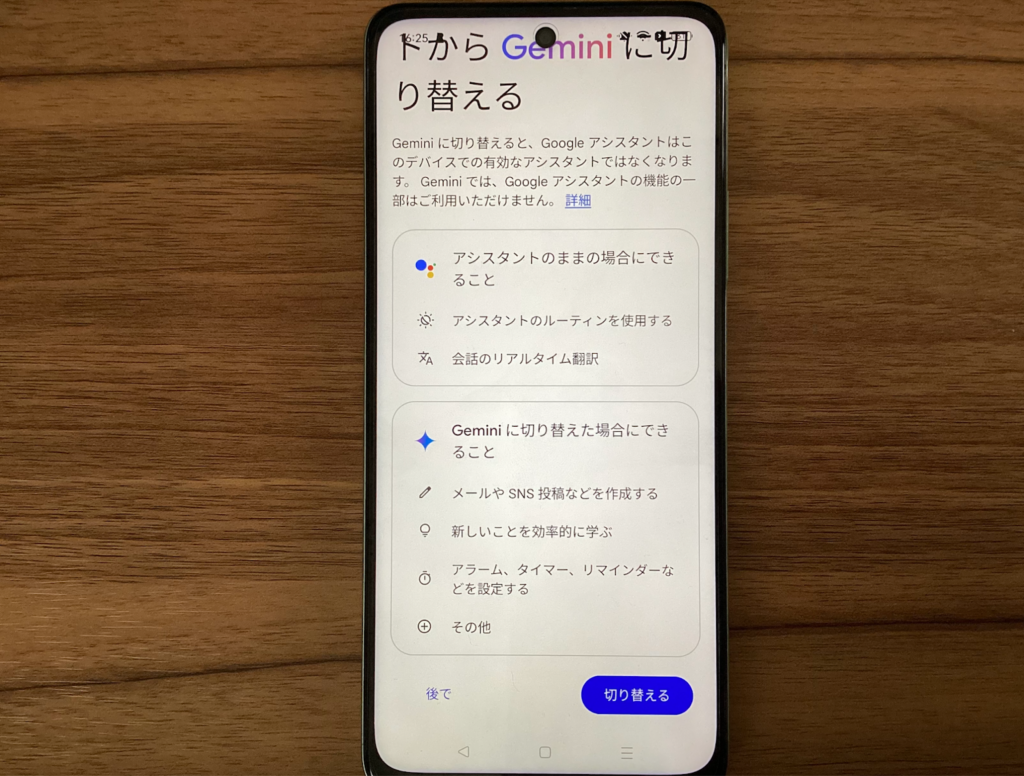
端末によっては、既存の音声アシスタント設定をGeminiに変更する案内が表示されることがあります。画面の指示に従って設定を進めてください。
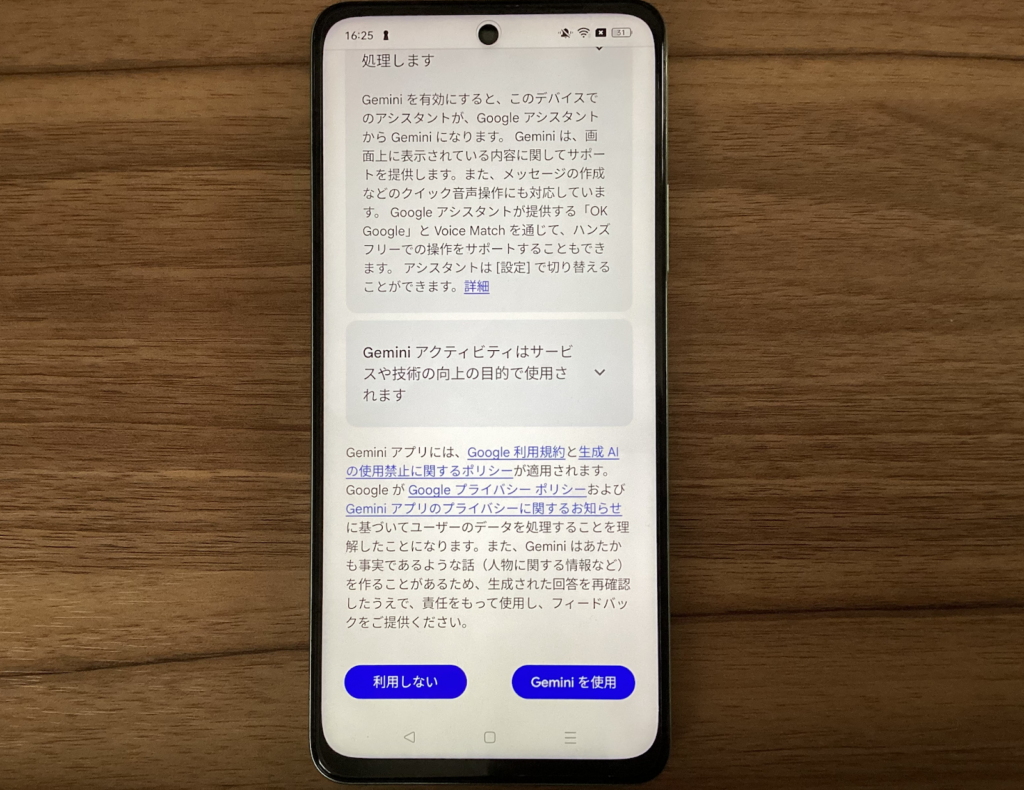
Geminiに切り替えたあとは、利用規約への同意を求められます。問題ない場合は「Geminiを使用」をタップしましょう。
ここまできたら、あとはプロンプトを入力して実際に利用するだけです。色々な質問を投げかけてみてください。
Geminiの使い方(iPad版)
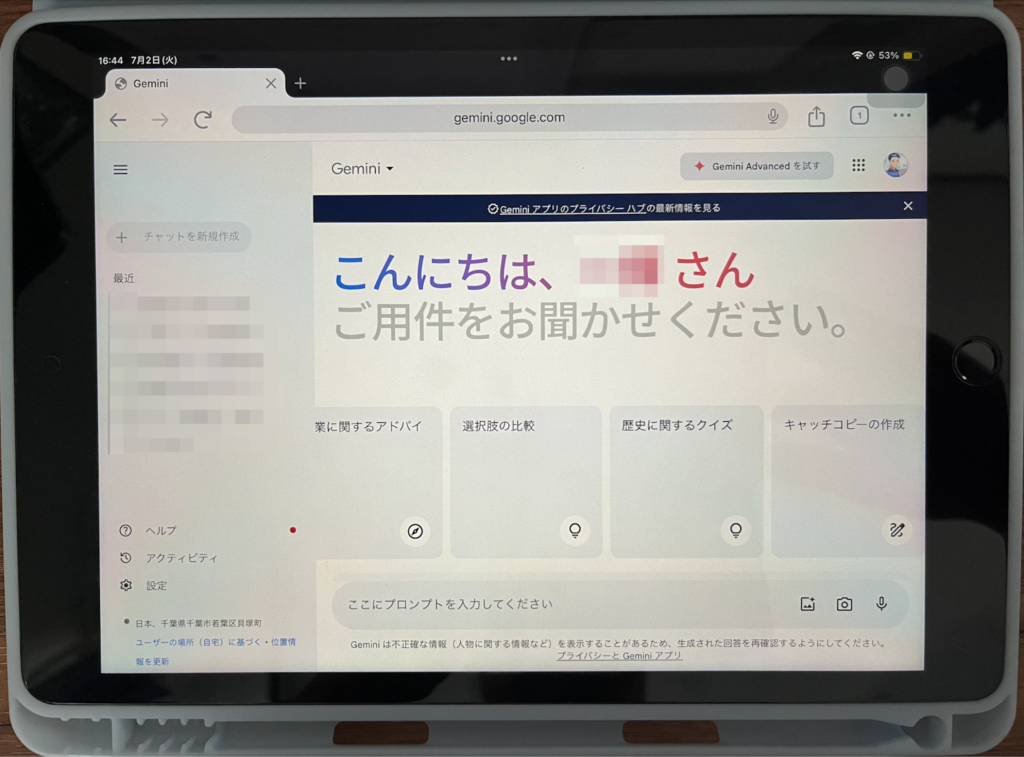
iPadでGeminiを使う場合は、iPhoneと同じくGoogleアプリを利用する方法と、PCと同じくブラウザから使用する方法の2通りがあります。
上記はブラウザから開いたものですが、検索画面で「Gemini」と検索して出てきたページを開いただけです。
PCやスマホと同じ方法で使えるようになるので、ここでは説明を割愛しますね。
Geminiでできること
Geminiでできることをざっくりまとめると、以下のとおりです。
▼Geminiでできること
- エージェント機能
- 情報収集
- 要約・翻訳
- コード生成
- 画像認識
- Nano Bananaによる画像生成
- 音声認識
- 動画生成
- Googleアプリとの連携
- Chromeアドレスバーからの利用
Google検索のAI機能が情報探しを助けるものだとすれば、Geminiはその情報を使って文章や資料を作るためのAI、と考えるとわかりやすいです。上記それぞれについて、筆者が実際にGeminiを使ってみた様子も交えて紹介しますね。
エージェント機能
Geminiでは、複数の手順をまとめて進めるエージェント機能の開発も進んでいます。情報を調べて整理し、そのまま下書きまでつなげる。いわば、作業を一歩先まで進めてくれる機能です。
Chromeと連携した自動化の取り組みも登場しました。ページの内容を読み取り、次にやるべき操作を提案しサポートしてくれます。
情報収集
Geminiは、Googleの検索エンジンと連動しているため情報収集のツールとして最適です。例えば、特定の日を指定して質問してみると、以下のように正確で詳細な回答を出力してくれます。
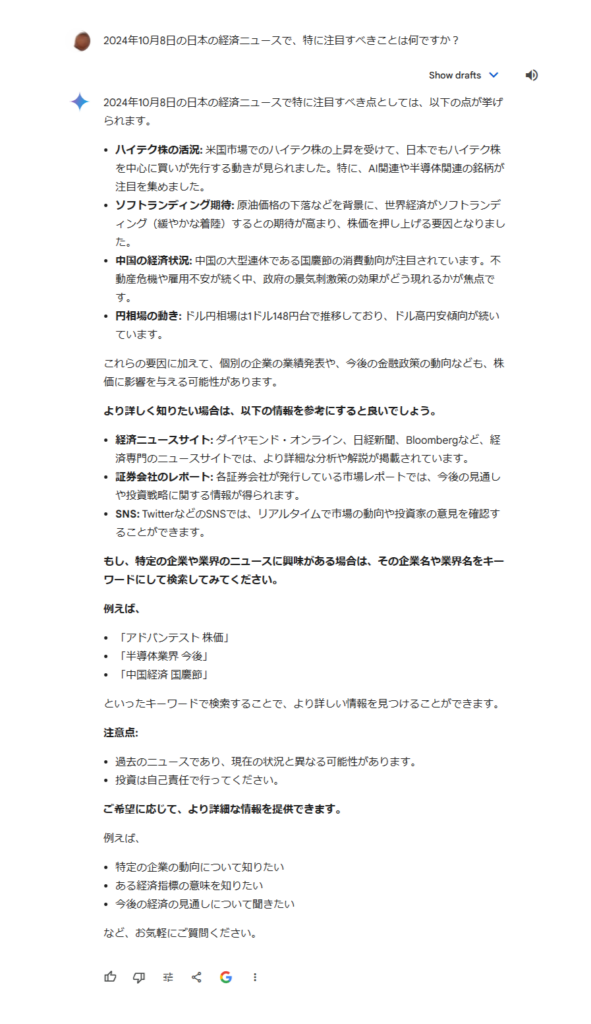
GeminiなどのAI検索エンジンを横断比較したい方は、以下の記事もご覧ください。
要約・翻訳
Geminiは、要約・翻訳ツールとしても非常に便利です。URLも読み込めるため、Webページを一切読まずに内容を把握できます。
例えば以下のように、Google Deepmindの会社案内ページのURLを貼り、「このページに書かれている内容を要約してください。」と入力すると…

以下のとおり、ページに書かれている内容をわかりやすくまとめてくれます。
▼回答
Google DeepMindは、Google傘下の人工知能(AI)研究開発企業です。2010年に設立され、英国ロンドンに本社を置いています。

Google DeepMindのミッションは、「AIの可能性を解き放ち、世界をより良くすること」です。そのために、AIの安全性と責任を重視した研究開発を行っています。

Google DeepMindの研究成果は、ゲーム、医療、材料科学、エネルギーなど、さまざまな分野で活用されています。

具体的な成果としては、次のようなものが挙げられます。

ゲーム「Go」で、人間の世界チャンピオンを破った「AlphaGo」の開発

医療画像の解析や創薬の支援を行う「AlphaFold」の開発

新材料の発見や開発を行う「AlphaFold-Mat」の開発

Google DeepMindは、AIの未来を切り拓くために、これからも研究開発を続けていきます。

以下に、ページに書かれている内容を要約したポイントをまとめます。

Google DeepMindは、Google傘下のAI研究開発企業である。

ミッションは「AIの可能性を解き放ち、世界をより良くすること」である。

AIの安全性と責任を重視した研究開発を行っている。

研究成果は、ゲーム、医療、材料科学、エネルギーなど、さまざまな分野で活用されている。若干の間違い(ハルシネーション)はあるものの、英文を一切読まずに内容を把握できるのは便利ですね!
コード生成
Geminiは、コード生成ツールとしても非常に便利です。例えば「Pythonを使用して、現在の日付と時刻を表示する簡単なスクリプトを作成してください。」と入力すると…
以下のとおり、正しく作動するコードを自動で生成してくれます。
▼回答
import datetime

now = datetime.datetime.now()

print(f"現在は、{now.year}年{now.month}月{now.day}日 {now.hour}時{now.minute}分{now.second}秒です。")
また、Geminiを使って、コードのデバッグ作業を自動化することも可能です。例えば以下のコードについて、エラーの原因を尋ねてみると…
def calculate_sum(a, b):

sum = a + b

print("合計は: ", sum)

calculate_sum(5, '3')
下記のとおり、エラーの原因を丁寧に説明してくれます。
▼回答
エラーの原因は、calculate_sum()関数の引数aとbの型が異なることです。aはint型、bはstr型です。int型とstr型を加算することはできません。

エラーの修正方法は、aまたはbの型を変更することです。aをstr型に変更すると、以下のように修正できます。

def calculate_sum(a, b):

sum = a + b

print("合計は: ", sum)

calculate_sum('5', '3')

この場合、aとbはどちらもstr型になります。str型同士の加算は可能です。したがって、エラーは発生しません。また、bをint型に変更してもエラーは修正できます。

def calculate_sum(a, b):

sum = a + b

print("合計は: ", sum)

calculate_sum(5, 3)

この場合、aはint型、bはint型になります。int型同士の加算は可能です。したがって、エラーは発生しません。
どちらの修正方法を採用するかは、コードの目的や意図によって判断する必要があります。簡単なプログラミング業務であれば、Geminiで大幅に負担を軽減できそうですね!
画像認識
Geminiはテキストだけでなく、画像も認識できます。
▼画像のアップロード方法
入力欄の左にあるマークから画像をアップロードする

例として、『茨城県の私立高等学校等に対する就学支援策』に関する資料スライドの画像をアップロードし、「以下の資料の内容について解説してください。」と入力すると…
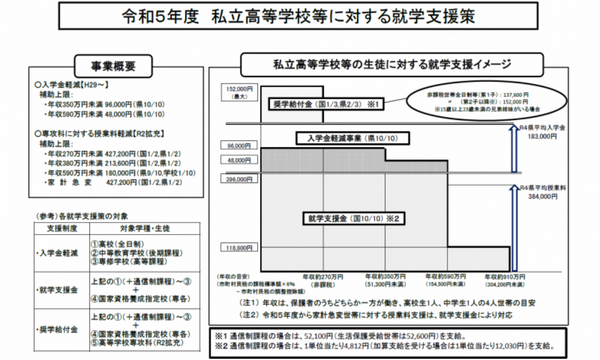
下記のとおり、スライドの内容をわかりやすく丁寧に解説してくれます!しかも、スライドに書かれていない補足情報もセットで。
▼回答
資料の内容は、茨城県が実施する令和5年度の私立高等学校等に対する就学支援策についてです。

支援策は、入学金軽減、就学支援金、奨学給付金の3種類があります。

入学金軽減は、私立高等学校の全日制課程、中等教育学校後期課程、高等課程、専修学校高等課程の入学金を、対象世帯の年収に応じて軽減する制度です。

就学支援金は、私立高等学校の全日制課程、中等教育学校後期課程、高等課程、専修学校高等課程の授業料を、対象世帯の年収に応じて支援する制度です。令和5年度から、家計急変世帯に対する授業料支援は、就学支援金により対応されます。

奨学給付金は、私立高等学校の全日制課程、中等教育学校後期課程、高等課程、専修学校高等課程、高等学校専攻科の授業料を、対象世帯の年収に応じて支援する制度です。

資料内の表は、各支援策の概要と、対象世帯の年収の目安を示しています。

具体的には、入学金軽減では、非課税世帯の全日制第1子は137,500円、その他の世帯の全日制は96,000円の軽減が受けられます。就学支援金では、年収約270万円未満の世帯は427,200円、年収約350万円未満の世帯は213,600円、年収約590万円未満の世帯は180,000円の支援が受けられます。奨学給付金では、年収約270万円未満の世帯は427,200円、年収約350万円未満の世帯は213,600円、年収約590万円未満の世帯は180,000円の支援が受けられます。

なお、資料内の年収の目安は、保護者のうちどちらか一方が働き、高校生1人、中学生1人の4人世帯の場合です。

資料の画像では、茨城県の私立高等学校等の平均入学金と授業料も示されています。令和4年度の平均入学金は183,000円、平均授業料は384,000円です。

これらの支援策により、私立高等学校等への進学を希望する家庭の経済的負担の軽減が図られます。
Geminiの画像認識機能を活用すれば、難解なスライド資料の内容も簡単に把握できますね!
※ちなみに2025年8月時点で、人物の画像をGeminiに入力すると……
このように、検閲されてしまいます。
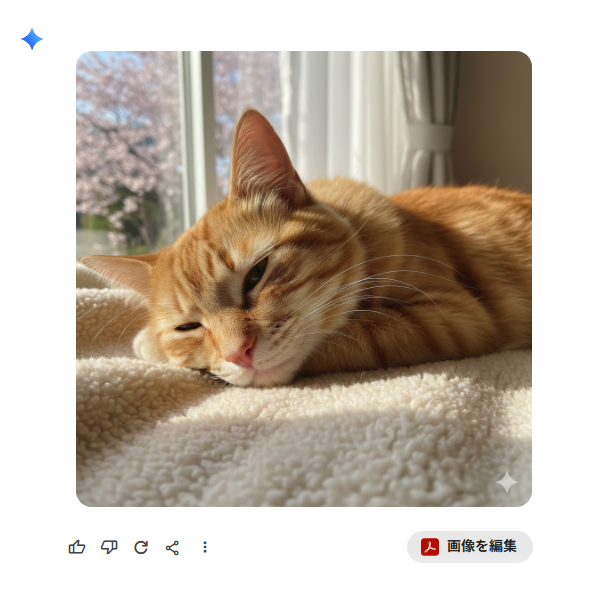
画像生成
Geminiは、Nano Bananaシリーズを使った画像生成が利用できます。無料プランでも日本語で画像を作成でき、簡単な指示からイラストや写真風の画像を生成できます。
有料プランでは、より高解像度での出力や細かい編集に対応しており、部分的な修正や文字入り画像の生成なども可能です。用途に合わせて、手軽に作るか、より品質を重視するかを選べるようになっています。
試しに、「猫の写真を生成して」とGeminiに入力してみました。
音声認識
Geminiには、音声認識機能が備わっています。使い方は簡単で、テキスト入力欄右下のマイクマークを押して話しかけるだけです。
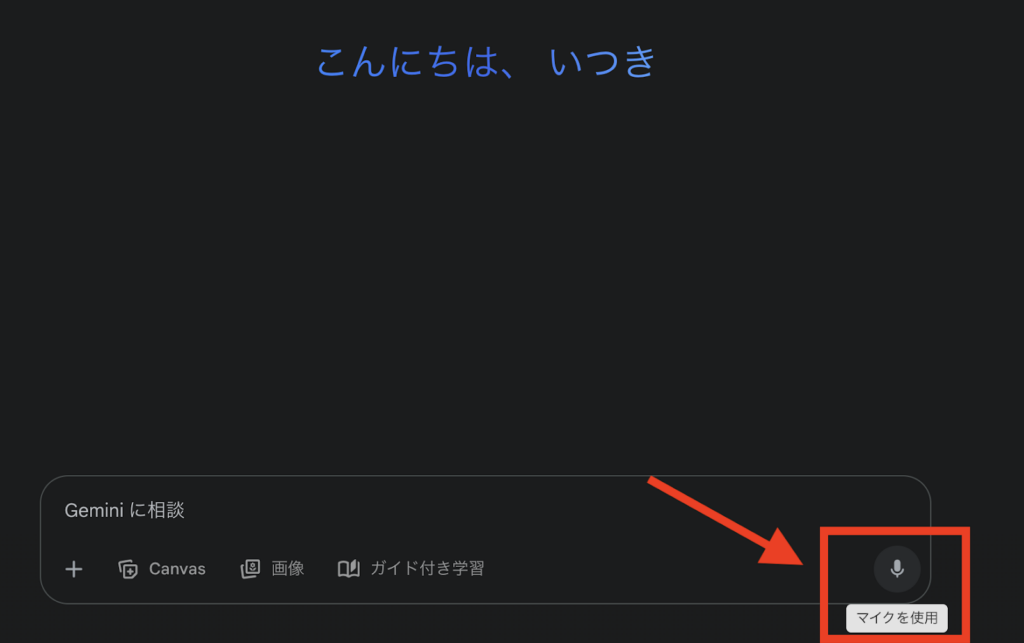
音声認識機能を使えば、AIと対話しながら面接練習や英語学習などができます。会議の際の文字起こしなどにも使えるため、ぜひ利用してみてください。
動画生成
Geminiの有料プランを契約すれば、Veo 3による動画生成機能を利用できます。Veoはテキストプロンプトをもとに、映画のような映像やスタイルのあるショートムービーを高精度で作り出せます。
広告用の動画生成などを効率化したい方は、ぜひ活用してみてください。
Deep Research
Deep Researchは、テーマを渡すだけで調査から整理、レポートのたたき台作成までをまとめて進めてくれる機能です。通常のチャットは質問に対して答えを返す形ですが、Deep Researchでは「このテーマを調べてまとめてほしい」と依頼すると、複数の情報を参照しながら内容を構造化してくれます。
調査メモというより、レポートの原稿に近い形で出力されるのが特徴です。
例えば、以下のような場面で役立ちます。
- ある業界の市場動向を整理したい
- 競合サービスを比較したい
- 新規事業の下調べをしたい
もちろん、出力された内容をそのまま使うのではなく、最終的な確認は必要です。ただ、ゼロから情報を集める手間が減るので、作業のスタートがかなり楽になります。
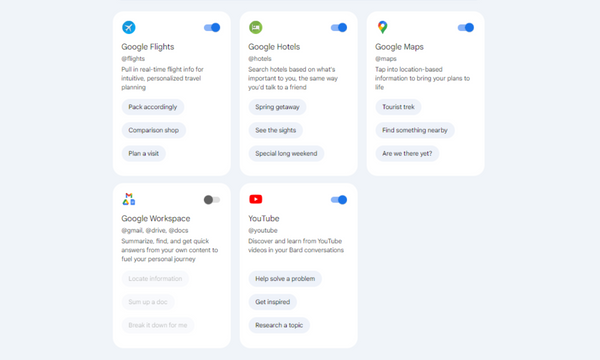
拡張機能によるGoogleアプリとの連携
Geminiには、下記のGoogleアプリと連携できる拡張機能(旧Bard Extensions)が備わっています。
- Google Flights
- Google Hotels
- Google Maps
- Google Workspace(Gmailなど)
- YouTube
2023年12月19日より、日本語入力でも利用できるようになりました。
▼拡張機能の使い方
1. 画面右上のマークをクリック
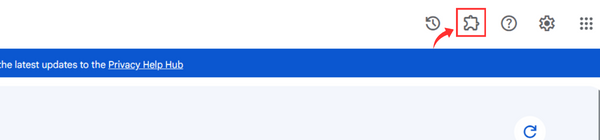
2. 連携したいアプリを選択
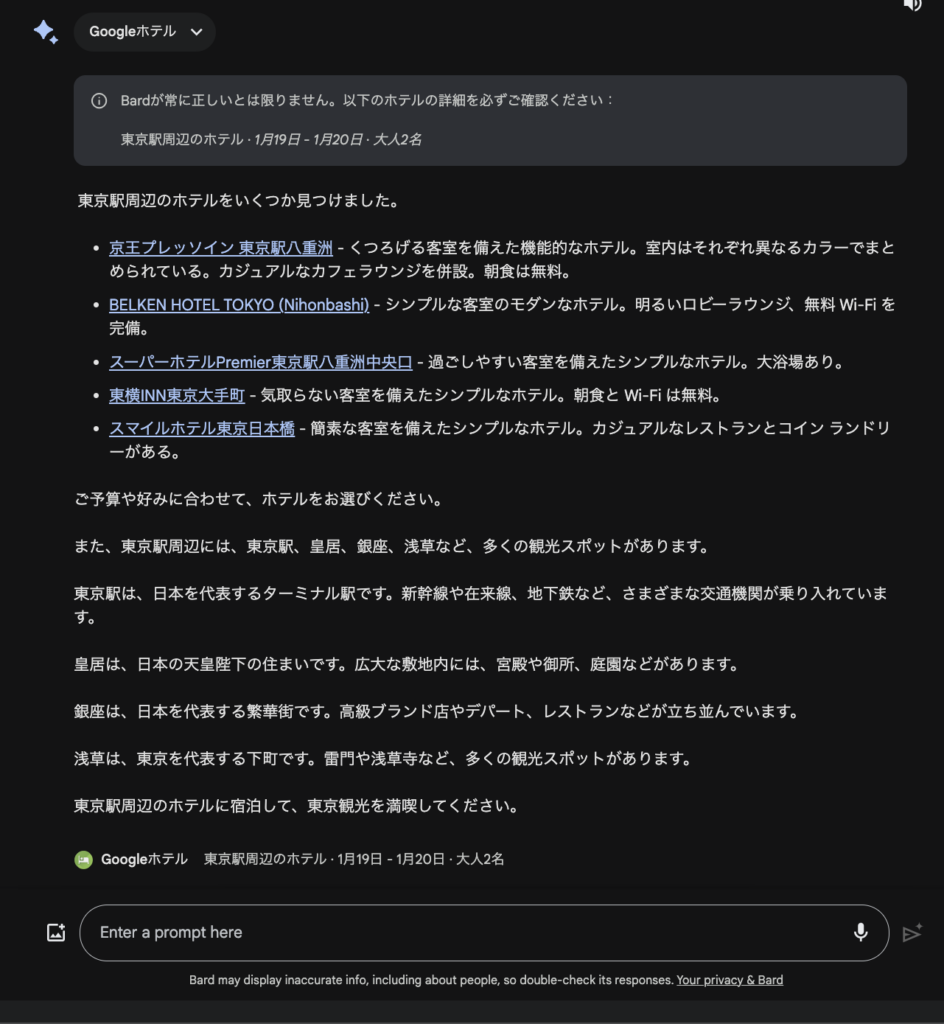
例としてGoogle Hotelsと連携して、「東京駅周辺のホテルと観光地を探してください。」と入力してみます。すると、以下のようにGoogle Hotelsの情報を基に、東京駅周辺のホテルと観光地をリンク付きで紹介してくれます。
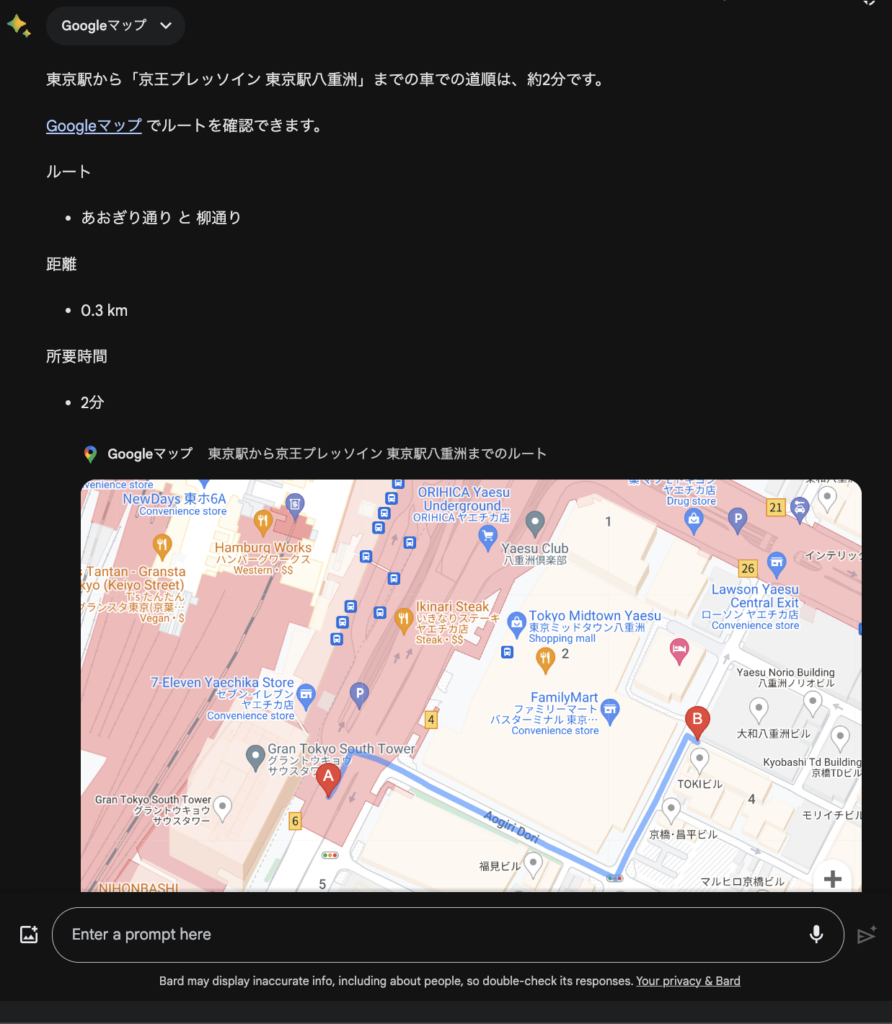
さらに、Google Mapsとも連携しているのでホテルまでの道順も教えてくれます。
「東京駅から「京王プレッソイン 東京駅八重洲」までの道順を教えてください。」と入力してみます。すると、Google Mapsを基に回答してくれます。
そのうえ、YouTubeとも連携していますので目的地周辺を紹介している動画も検索してくれます。
「東京の見どころを紹介した動画はありますか?」と質問すると次のような回答をしてくれました。
これすごくないですか⁉
普段Googleアプリを利用している方であれば、拡張機能を活用することで作業量を大幅に削減できますよ!
Chromeアドレスバーからの利用
Googleが2024年4月から提供を開始した新機能で、Chromeブラウザのアドレスバーから直接Geminiを利用できるようになりました。これまでは別タブでGeminiを開く必要がありましたが、この機能によってブラウザ上での作業を中断することなく、スムーズにAIアシスタントを活用できます。
使い方としては、まずChromeブラウザのアドレスバーをクリックし、「@gemini」と入力。

その後、TabキーまたはSpaceキーを押して、質問や指示を入力してEnterキーをクリック(今回は、「今日の天気は?と入力)。

そうすると、以下のようにGeminiの画面に切り替わり、今日の天気を教えてくれます。
とても便利ですね!

GeminiとChatGPT・その他AIの違い
| 項目 | Gemini | ChatGPT | Claude | Copilot |
|---|---|---|---|---|
| モデル名 | Gemini 2.5 Pro / 2.5 Flash | GPT-4o / GPT‑4.1 mini / o3 / o4-mini / o4-mini-high / o3 Pro | Claude Opus 4.1/ Sonnet 4 | Copilot(GPT-4 Turboベース) |
| 料金 | 無料版:無料 Google AI Pro:月額2,900円 Google AI Ultra:月額18,000円 | 無料版:無料 Plus:月額20ドル Pro:月額200ドル Team:月額25ドル Enterprise:要相談 | Freeプラン:無料 Proプラン:月額17ドル Maxプラン:月額100ドル / 月額200ドル Team:月額25ドル Enterprise:要相談 | 無料版:無料Copilot Pro:月額3,200円 |
| 長文処理能力 | 約100万トークン(2.5 Pro) | 約20万トークン(o1) | 約20万トークン(Opus4.1) | 約128kトークン |
| 日本語の精度 | かなり高い | かなり高い | 高い(自然な文体) | 高い |
| 対応タスク | テキスト生成 / 画像入力 / 画像生成 / 音声入力(アプリ) / 動画生成 / コード生成 / Webブラウジング | テキスト生成 / 画像入力 / 画像生成 / 音声入力(アプリ) / 動画生成 / コード生成 / Webブラウジング | テキスト生成 / 画像入力 / 音声入力 / コード生成 / Webブラウジング | テキスト生成 / 画像入力 / 画像生成 / 音声入力 / コード生成 / Webブラウジング |
| 独自の強み | Googleサービスとの連携 | マルチモーダル対応+豊富なツール連携 | 自然な文章生成が可能 | Microsoft製品との連携が強力 |
ChatGPTを始めとした主要なAIツールとGeminiを比較してみました。Geminiが他のAIを圧倒しているのが長文理解力とGoogleサービスとの連携機能です。
コンテキストウィンドウが100万トークンと多いため、長文を理解してユーザーニーズに沿った回答を生成してくれます。
また、Googleドキュメントやスプレッドシートとの連携機能にも魅力があるので、ビジネス利用を前提にしている方はGeminiを利用してみてください。
なお、最新のGeminiとChatGPTの日本語性能の比較について詳しく知りたい方は、下記の記事を合わせてご確認ください。
Geminiの活用事例12選
Geminiは、多くの業務を効率化できるAIツールです。単純に文章を作成するだけでなく、プログラミングのコード作成や商品画像からキャッチコピーを作成することも可能です。
ここでは、Geminiの活用事例をご紹介するので、使えそうなものがあったら試してみてくださいね!
【画期的!】GeminiがGmailと連携!
Googleが提供しているサービスと連携できることも、Geminiの魅力の1つです。Geminiを使えば、メールの返信内容を瞬時に生成し、そのままGmailの下書きに保存できます。時間がないときでも、Geminiがクオリティの高いメールを作成してくれます。
特に便利なのは、メールの文脈を理解した返信文の生成です。取引先との過去のやり取りや添付ファイルの内容まで考慮して、適切な返信文を作成してくれます。また、複数の返信案から選べるため、状況に応じた最適な文面を選択できます。これでメール作成のストレスから解放されますね!
【驚愕!】GeminiでPython画像処理アプリのモックアップ
Geminiは、コード生成機能を有していると先述しましたが、それだけではありません。Pythonの画像処理アプリのモックアップ作成を指示したところ、なんと複数の実装方法とコードを提案してくれました。
生成されたコードには詳細なコメントが付与され、各行の動作説明も含まれています。また、コードの最適化提案やセキュリティ上の注意点まで指摘してくれるため、初心者でも安心して利用できます。あとは、どのコードを使うか選ぶだけですから大変便利ですね!
【革新的】市場分析もGeminiで!
最新情報の取得ができるGeminiなら市場分析も可能です。株価指数や為替の値動きなど、リアルタイム情報を表にして、相場変動の理由まで教えてくれます。
さらに、業界トレンドの追跡や、製品・サービスに関連する最新のキーワードの把握にも役立ちます。市場調査や競争分析といった複雑なデータ処理タスクを支援し、定量的なデータと定性的な分析を組み合わせることで、より正確な市場動向の予測ができるのです。
これで、ニュースサイトを読み漁る必要はなくなりますね!出先で確認したいときに試してみてください。
【画像入力に対応】Geminiでのマルチモーダル体験とその実用例
Geminiは画像入力に対応しています。
このような複数入力(マルチモーダル)は、ChatGPTでは有料版の「ChatGPT Plus」でしか利用できません。これを機にGeminiで一足先に体験しましょう。画像入力ができることで、以下のようなことが実現可能になります。
- 画像内の文字の読み取りと文字起こし
- 商品写真を理解してキャッチコピーを作成
- サイト構成のラフ画をもとにフロントエンドを作成
画像ファイルを送信することで、「商品の名前」「どのように使うのか?」などの情報を文字に起こして、解説してもらうことが可能です。画像が入力できるだけで、さらにできることのバリエーションが増えそうですね!
【間違い探しに最適!】Geminiなら文章の校正・校閲も可能
Geminiに自身が作成した文章を送信すると、漢字の間違いや不適切な言い回しを指摘してもらうことが可能です。間違った情報も修正してくれるので、虚偽の情報を発信してしまうのを防げます。意味不明な指摘をされることもありますが、間違っている文章自体を見つけてくれるのは魅力的ですよね!
以下で、実際に校正を依頼した際のプロンプトを紹介します。
▼プロンプト
『次の文章を校正してください。「Google Bardはマイクロソフト社が2020年にリリースしたサービスです。現在すでに本格運用が開始されており、月額20ドルで利用できます。」』▼回答
校正した文章は次のとおりです。

Google BardはGoogle社が2023年にリリースしたサービスです。現在すでに本格運用が開始されており、無料で利用できます。

修正箇所は次のとおりです。

1行目:Google社が開発したサービスであるため、社名を「マイクロソフト」から「Google」に修正しました。

2行目:2023年にリリースされたため、「現在すでに本格運用が開始されており」と修正しました。

3行目:月額20ドルで利用できるサービスは「ChatGPT」であり、「Google Bard」は無料で利用できるサービスであるため、「月額20ドルで利用できます」を「無料で利用できます」に修正しました。

また、以下のような修正も考えられます。

1行目:リリースした時期を明確にするため、「2023年5月」と具体的な日付を記載することもできます。

2行目:本格運用が開始された時期を明確にするため、「2023年8月」と具体的な日付を記載することもできます。
修正箇所や修正内容は、文章の目的や読者層に合わせて適宜調整してください。上記のように、誤った情報を箇条書き形式で指摘してもらえると非常にわかりやすいですよね。自身で校正を実施する前に、一度Geminiで校正してみると意外な発見があるかもしれません!
【多言語対応の翻訳】外国語の記事や資料をすばやく理解
Geminiを使えば、外国語の記事やPDF資料を日本語に翻訳できます。文章の意味を保ちながら自然な日本語に整えてくれるため、海外情報の収集にも役立ちます。
試しに、Gemini公式のポストを翻訳してみます。
▼プロンプト
次の文章を翻訳してください。「Nano Banana 2 is here.Our latest image model gives you the power of Pro at the speed of Flash. You can create images with real-world accuracy, add text in many languages, and bring your wildest ideas to life faster with vibrant lighting, richer textures and sharper details.」▼回答
このように、英語の文章を違和感のない日本語の文章に翻訳できます。これくらいの短い文章では、翻訳までの時間も30秒とかかりません。逆に日本語を英語に翻訳すれば、海外でのコミュニケーションにも役立つかもしれませんね。
【ワンランク上の文字起こし】Google Pixel スマートフォンでAI機能が使える!
Googleが提供しているGoogle Pixel 8とGoogle Pixel 8aには、Gemini Nanoが搭載されています。
レコーダー アプリの要約機能を使えば、会議中の発言を文字起こしすることが可能です。さらに、発言者をラベル付けする機能まで搭載するなど、その機能はさらに便利になっています。
テキストファイルやGoogle ドキュメントにエクスポートもできるので、文字起こし後はスムーズに社内の担当者へ共有ができます。
【カスタムチャットボット作成】Gemsでオリジナルチャットボットが作れる!
2024年8月28日にGoogleから、Geminiをカスタマイズできる機能「Gems」が公開されました。
ChatGPTのGPTsと似た機能で、特定のタスクを処理することに特化した自分専用のチャットボットを作成できます。
Gems最大の特徴は、他のGoogleサービスと連携したチャットボットを簡単に作成できる点です。
たとえば、Gmailと連携して未読のメールを取得し、未読メールへの返信を生成するチャットボットや、Google Driveと連携してGoogle上で自分が扱っている情報にアクセスできるチャットボットなどが作成可能です。
ChatGPTでGoogleサービスと連携するためには複数のステップが必要になります。その点、GemsならGoogleサービスと直に連携したチャットボットを簡単に作成できるので、普段からGoogleサービスを利用している方には大変便利な機能です!
【Chrome連携】アドレスバーからGeminiを瞬時に起動!
Chromeブラウザの最新アップデートで、業務効率を劇的に向上させる革新的な機能が登場しました。
おすすめの使い方
- 会議中の即時ファクトチェック
- 外国語サイトの瞬時翻訳
- データ分析時の数式確認
この機能は、ChromeブラウザのシェアNo.1という強みを活かし、ビジネスシーンでの活用が急速に広がっています。特に、複数のツールを行き来する必要がなくなった点が、多くのユーザーから高く評価されています。
【AI動画生成】CM風の動画を作成
Geminiには動画生成モデルのVeo 3が搭載されているため、動画の生成もできます。実際に、Geminiを使って、コカコーラのCM風動画を生成した方がいました。
こちらの動画ですが、なんと2分で作ったとのこと。企業が実際にCMを作るシーンを想定すると、2分で動画が完成するのは驚きですよね!
動画生成を効率化したい方は、ぜひGeminiの動画生成機能を使ってみてください。
【AI絵本】Storybooks機能で絵本を作成
2025年8月より、GeminiアプリにStorybooks機能が追加されています。Storybooks機能は、ナレーション付きで10ページの絵本を作成できる機能です。
実際にStorybooks機能で絵本を作っている方がいたのでご紹介します。
こちらの絵本では、大学生の男性がAIを学んでアプリを制作する過程を描いています。純粋に絵本を作成するだけでなく、個人や企業のストーリーを伝える手段としても活用できそうです。
【Deep Research】AIで調査レポートを作成
GeminiのDeep Researchを使えば、テーマを入力するだけで情報収集から整理、レポートの下書き作成までをまとめて作成可能。市場調査や競合分析、リサーチ業務の効率化に役立ちます。
これまで時間がかかっていた調査作業も、GeminiAIに任せればかなり楽になります。リサーチやレポート作成の手間を減らしたい方には便利な機能です。
Geminiに関するよくある質問
なお、Gemsについて詳しく知りたい方は、下記の記事を合わせてご確認ください。

Google Geminiを活用しよう!
今回紹介したGeminiについて、情報をまとめると下記のとおりです。
| モデル | Gemini 3シリーズ(高速モード・思考モード・Proモード) |
|---|---|
| 料金 | 無料 ※有料版(Google AI Pro)は月額2,900円 |
| 利用条件 | Googleアカウントがあれば誰でも利用可能 |
| 活用方法 | 情報収集・要約・翻訳・コード生成・画像認識・音声認識・画像生成・動画生成・Googleアプリとの連携、カスタムチャットボット作成など |
Geminiはさまざまな用途で活用できる、非常に便利なAIツールです。Googleアカウントさえあれば誰でも無料で使い放題なので、興味のある方はぜひ一度お試しください!
最後に
いかがだったでしょうか?
Geminiの多機能性を最大限に活かせば、効率的な業務改善が可能です。
株式会社WEELは、自社・業務特化の効果が出るAIプロダクト開発が強みです!
開発実績として、
・新規事業室での「リサーチ」「分析」「事業計画検討」を70%自動化するAIエージェント
・社内お問い合わせの1次回答を自動化するRAG型のチャットボット
・過去事例や最新情報を加味して、10秒で記事のたたき台を作成できるAIプロダクト
・お客様からのメール対応の工数を80%削減したAIメール
・サーバーやAI PCを活用したオンプレでの生成AI活用
・生徒の感情や学習状況を踏まえ、勉強をアシストするAIアシスタント
などの開発実績がございます。
生成AIを活用したプロダクト開発の支援内容は、以下のページでも詳しくご覧いただけます。
➡︎株式会社WEELのサービスを詳しく見る。
まずは、「無料相談」にてご相談を承っておりますので、ご興味がある方はぜひご連絡ください。
➡︎生成AIを使った業務効率化、生成AIツールの開発について相談をしてみる。
「生成AIを社内で活用したい」「生成AIの事業をやっていきたい」という方に向けて、通勤時間に読めるメルマガを配信しています。
最新のAI情報を日本最速で受け取りたい方は、以下からご登録ください。
また、弊社紹介資料もご用意しておりますので、併せてご確認ください。